

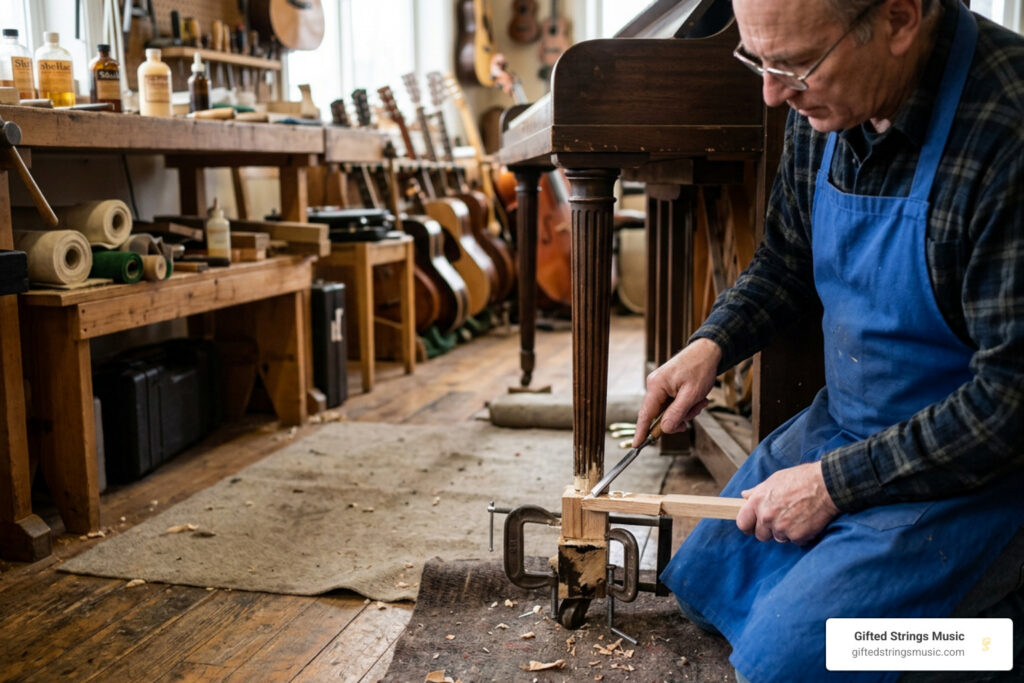
A Safe First Response to a Broken Upright Piano Leg
Do not try to glue or move a broken upright piano leg while it is carrying weight. For a safe upright piano leg repair, first stop anyone from pushing the piano, chock the casters, and inspect the crack and caster area for loose wood, a gap that opens under pressure, or crushed fibers. Then have the damaged corner lifted only slightly from a solid structural point and supported with secure blocking before the leg is removed or repaired.
Many upright pianos weigh more than 500 pounds. Even when the front legs carry less weight than the back of the cabinet, a cracked leg or loose caster socket can fail suddenly when the piano is rolled, pulled across carpet, or bumped during a move.
A durable repair usually needs more than adhesive. Clean wood surfaces, a properly selected structural adhesive, and mechanical reinforcement such as hardwood dowels, bolts, or threaded inserts help the joint resist sideways force. If the wood is split beyond repair, rotten, badly crushed, or missing, replacing the leg may be the safer choice.
For a treasured home piano or a school instrument, treat a broken leg as a stability issue first and a cosmetic issue second.
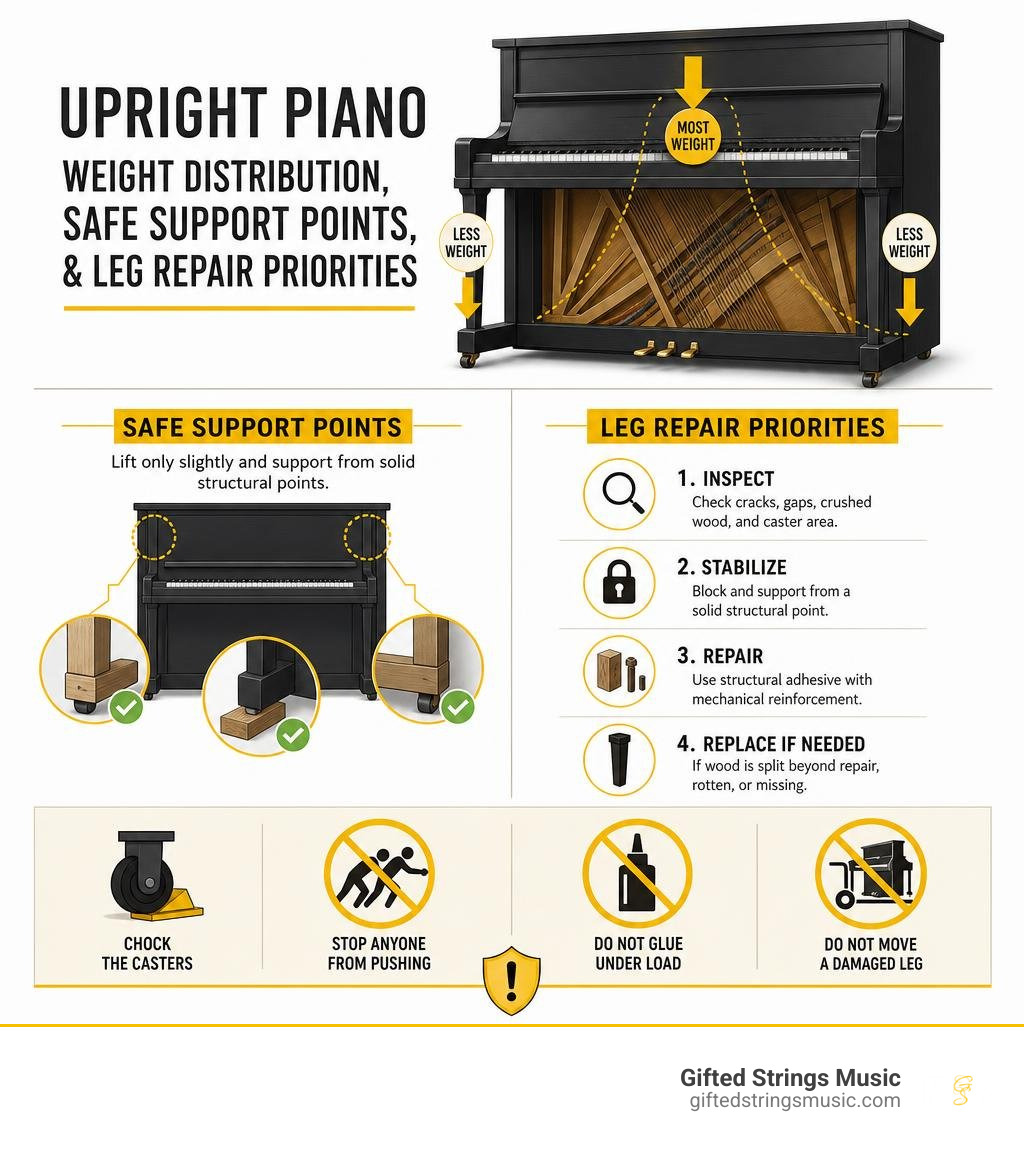
Upright piano leg repair terms to remember:
Assessing Damage: Cosmetic Cracks vs. Structural Failure
When you notice damage on an upright piano leg, the first step is determining whether you are dealing with a superficial finish check or a serious load-bearing failure. Pianos experience constant mechanical tension. The massive cast-iron plate and strung scale place continuous downward pressure on the cabinet frame, and any lateral shear force—such as sliding the piano over a rug—can cause sudden damage.
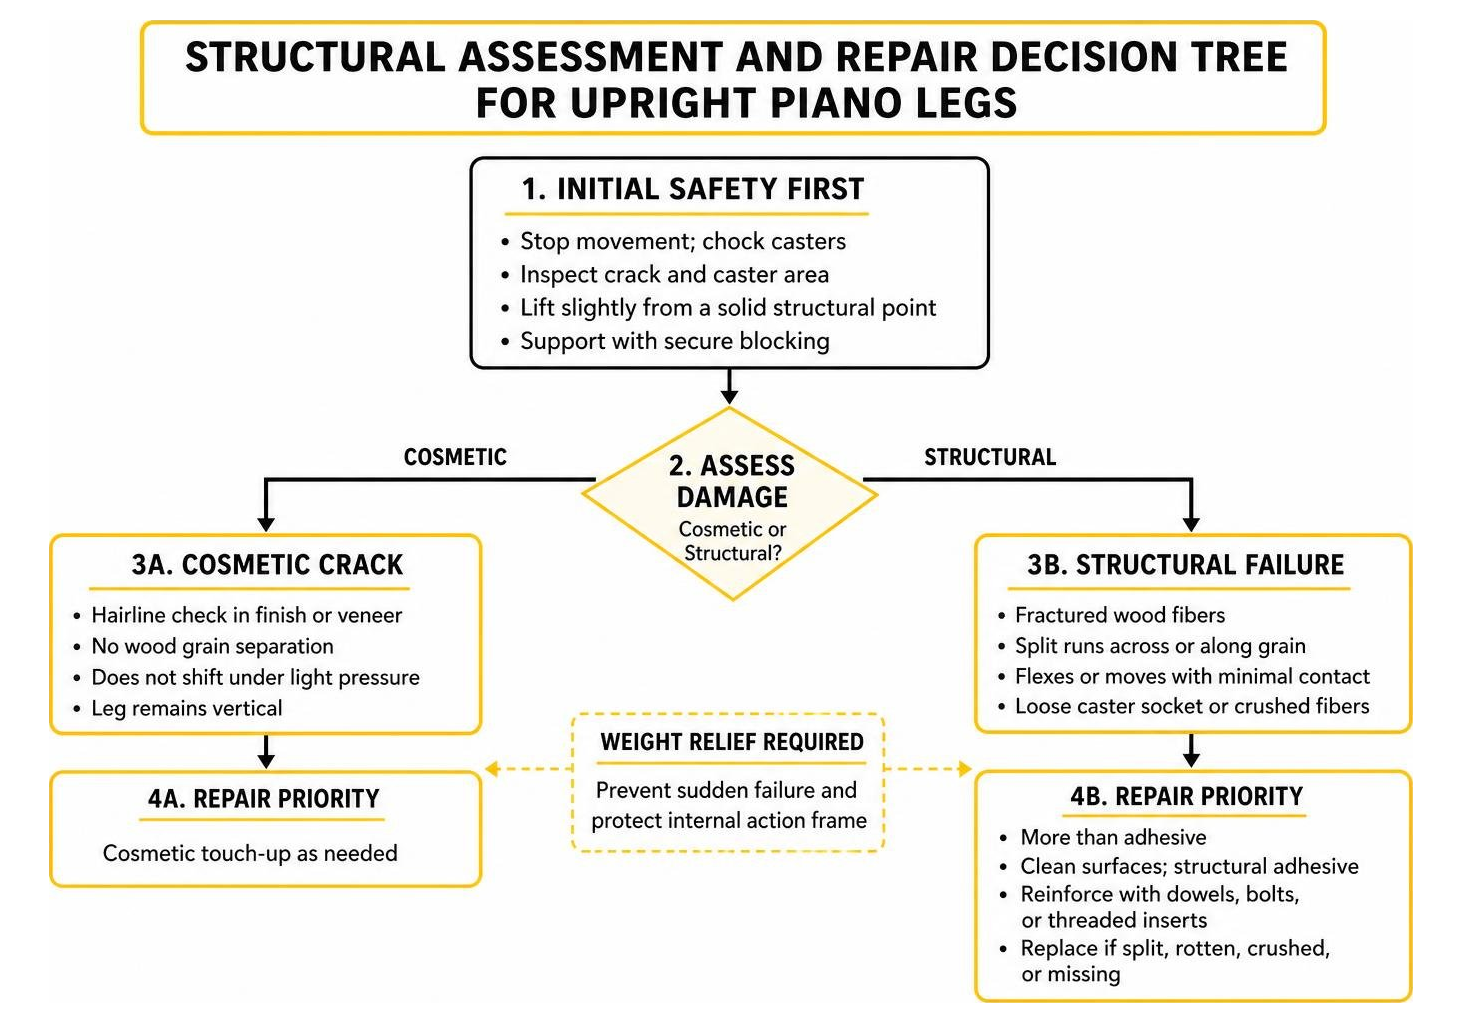
A cosmetic issue typically presents as a hairline check in the outer lacquer or veneer without wood grain separation. These cracks do not shift when light hand pressure is applied, and the leg remains perfectly vertical.
In contrast, a structural failure involves fractured wood fibers, a split running diagonally across the grain, or a leg that flexes under minimal contact. Structural damage requires immediate weight relief to prevent the keybed from dropping and cracking the internal action frame. To ensure the rest of the internal assembly has not suffered from uneven stress distribution, learning why every piano owner should schedule a professional piano inspection is an excellent step toward safeguarding your instrument.
Technicians also encounter complex joinery problems documented in classic field resources like Leg Problems, where internal mounting bolts, dowel pins, or hidden tenons fail completely out of sight.
Identifying Load-Bearing Fractures and Caster Plate Damage
To properly diagnose the severity of the damage, inspect three critical stress areas:
- The Upper Joinery/Keybed Interface: Examine where the top of the leg mates with the underside of the keybed shelf. Look for stripped mounting screws, cracked toe blocks, or gaps that widen when you apply gentle upward pressure on the keyboard shelf.
- The Main Leg Shaft: Diagonal fractures across the grain are true shear breaks. These commonly occur when an upright is pushed across deep carpeting without lifting, creating massive lateral torque at the narrowest point of the turned leg.
- The Caster Socket and Base: Check the bottom of the leg where the caster stem inserts. Crushed wood fibers, splintering around the caster plate, or socket displacement mean the wheel can no longer distribute downward weight evenly, posing an immediate tipping hazard.
Safe Jacking and Keybed Support Protocols
Never attempt an upright piano leg repair while the instrument rests its full weight on the damaged assembly. Upright pianos can weigh well over 500 pounds, with the majority of mass concentrated in the upper rear cast-iron harp and soundboard. Lifting requires deliberate safety measures.
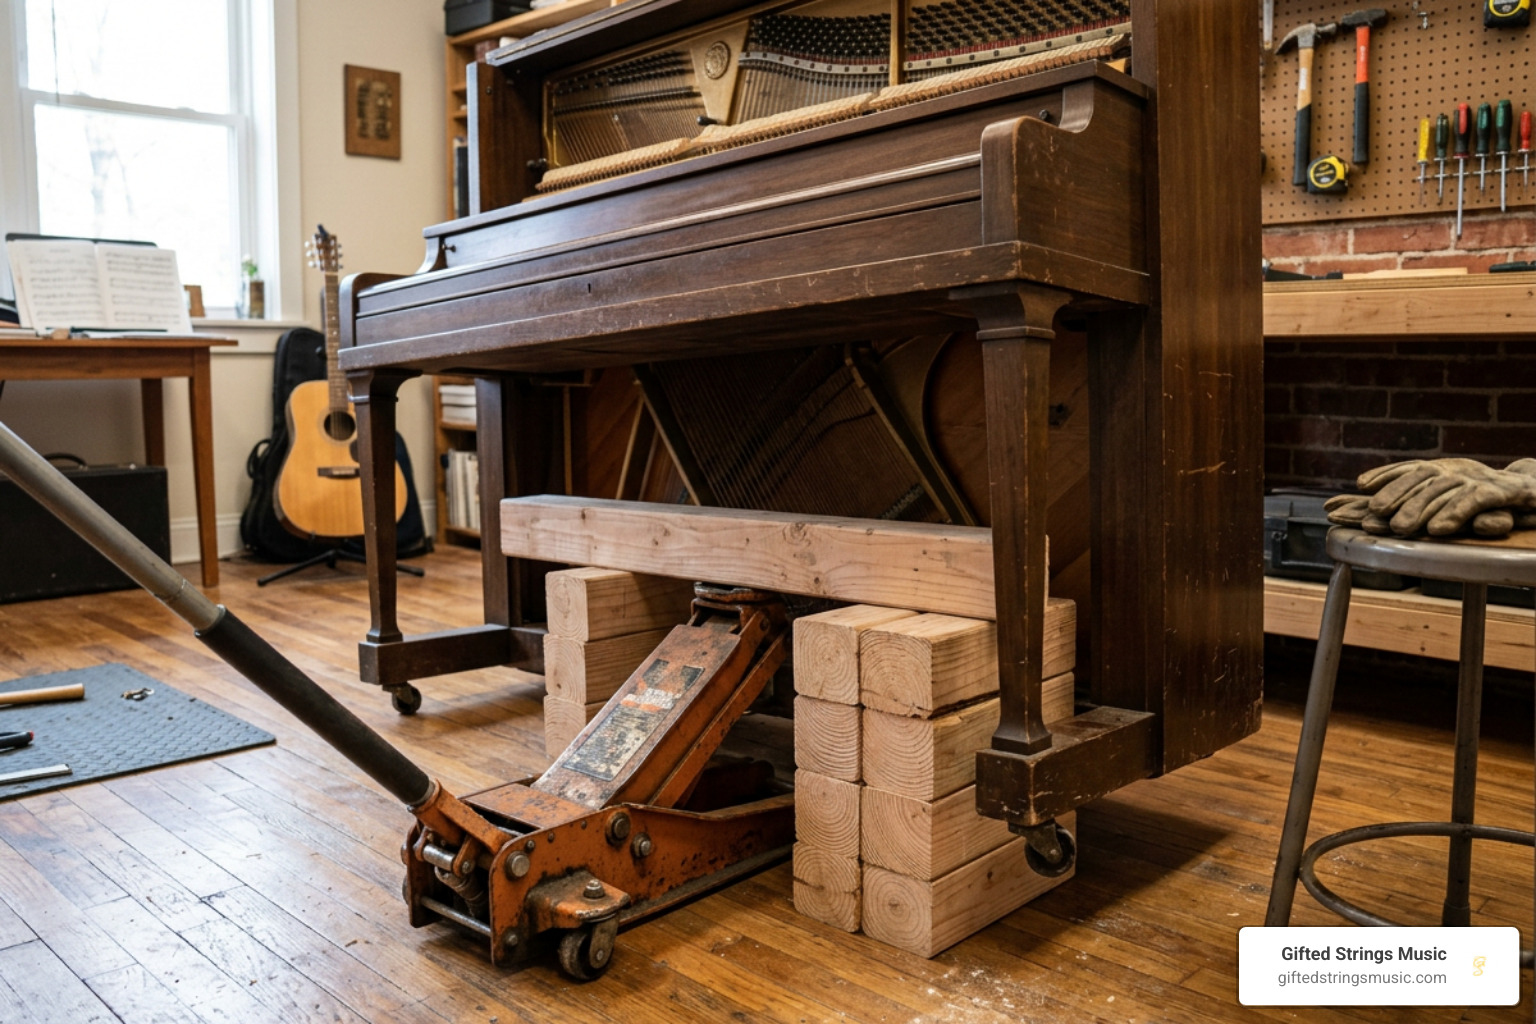
- Secure the Surrounding Area: Place wheel chocks behind the remaining operational casters to stop any rolling. Warn household members or students to stay clear of the piano.
- Select Safe Lift Points: Only position lifting equipment directly beneath the solid structural keybed frame or the bottom structural perimeter posts. Never place a jack under the decorative keyboard shelf, toe blocks, or bottom kickboard, as these thin components will splinter under load.
- Use the Right Equipment: Use a low-profile hydraulic bottle jack or automotive floor jack rated for at least 1,000 lbs. Place a wide, dense hardwood block (such as oak or maple) or a heavy rubber pad between the jack head and the piano cabinet to distribute lifting pressure safely.
- Elevate Conservatively: Lift the damaged corner slowly by no more than 0.5 inches—just enough to relieve compression from the leg.
- Install Redundant Secondary Blocking: Once raised, immediately insert solid wood cribbing blocks or heavy-duty jack stands next to the jack beneath the main structural frame. Never place your hands underneath an instrument supported solely by hydraulic pressure.
When planning major structural moves or complex relocations involving compromised legs, reviewing protecting your instrument why homeowners trust gifted strings for piano moving ensures you avoid catastrophic transit accidents.
Preparing and Decontaminating the Fracture Surface
A repair is only as good as the adhesive interface. Modern wood glues will not bond to ancient, crystallized adhesives.
- Identify the Existing Adhesive: Many vintage uprights were assembled with animal hide glue. Test the residue by touching it with a cloth soaked in near-boiling water. If the adhesive softens, liquefies, and turns tacky, it is traditional hide glue.
- Remove Old Residues: Scrape away all crystallized adhesive, dirt, and loose wood splinters using a fine cabinet scraper, wire brush, or chisel down to bare wood. If synthetic adhesives like old epoxy or polyurethane were used in a previous botched fix, soften them carefully with a targeted heat gun and scrape clean.
- Square and Dry-Fit the Joint: If the break is jagged, dry-fit the pieces together. If wood fibers have been crushed or lost, use a thin-kerf pull saw or fine rasp to create a clean, flush mating surface, planning to bridge any lost length with hardwood spacers or thickened structural epoxy.
Step-by-Step Upright Piano Leg Repair Guide
Achieving a durable joint requires combining the right adhesive with internal mechanical fasteners. Because the front legs encounter both downward vertical pressure and dynamic lateral loads whenever someone bumps or plays the piano, glue alone is insufficient.
| Adhesive Type | Open Assembly Time | Gap-Filling Capability | Mechanical Shear Strength | Best Application for Piano Legs |
|---|---|---|---|---|
| PVA / Aliphatic Resin (Titebond II/III) | 10–15 Minutes | Very Poor (Shrinks upon drying) | High on tight wood-to-wood joints | Clean, un-splintered breaks with 100% mating contact |
| Two-Part Structural Epoxy (Slow-Cure) | 30–90 Minutes | Excellent (Non-shrinking, structural) | Superior across end-grain & voids | Fractures with missing wood fibers or uneven breaks |
| Hot Liquid Hide Glue | 1–3 Minutes | Moderate | High (Traditional reversibility) | Historical restoration where authentic reversibility is required |
Adhesive Selection and Doweling for Upright Piano Leg Repair
Standard PVA wood glue lacks the mechanical shear strength needed to withstand lateral room vibrations and moving stresses on its own. For maximum durability, always reinforce the joint with internal fluted hardwood dowels or metal threaded inserts.
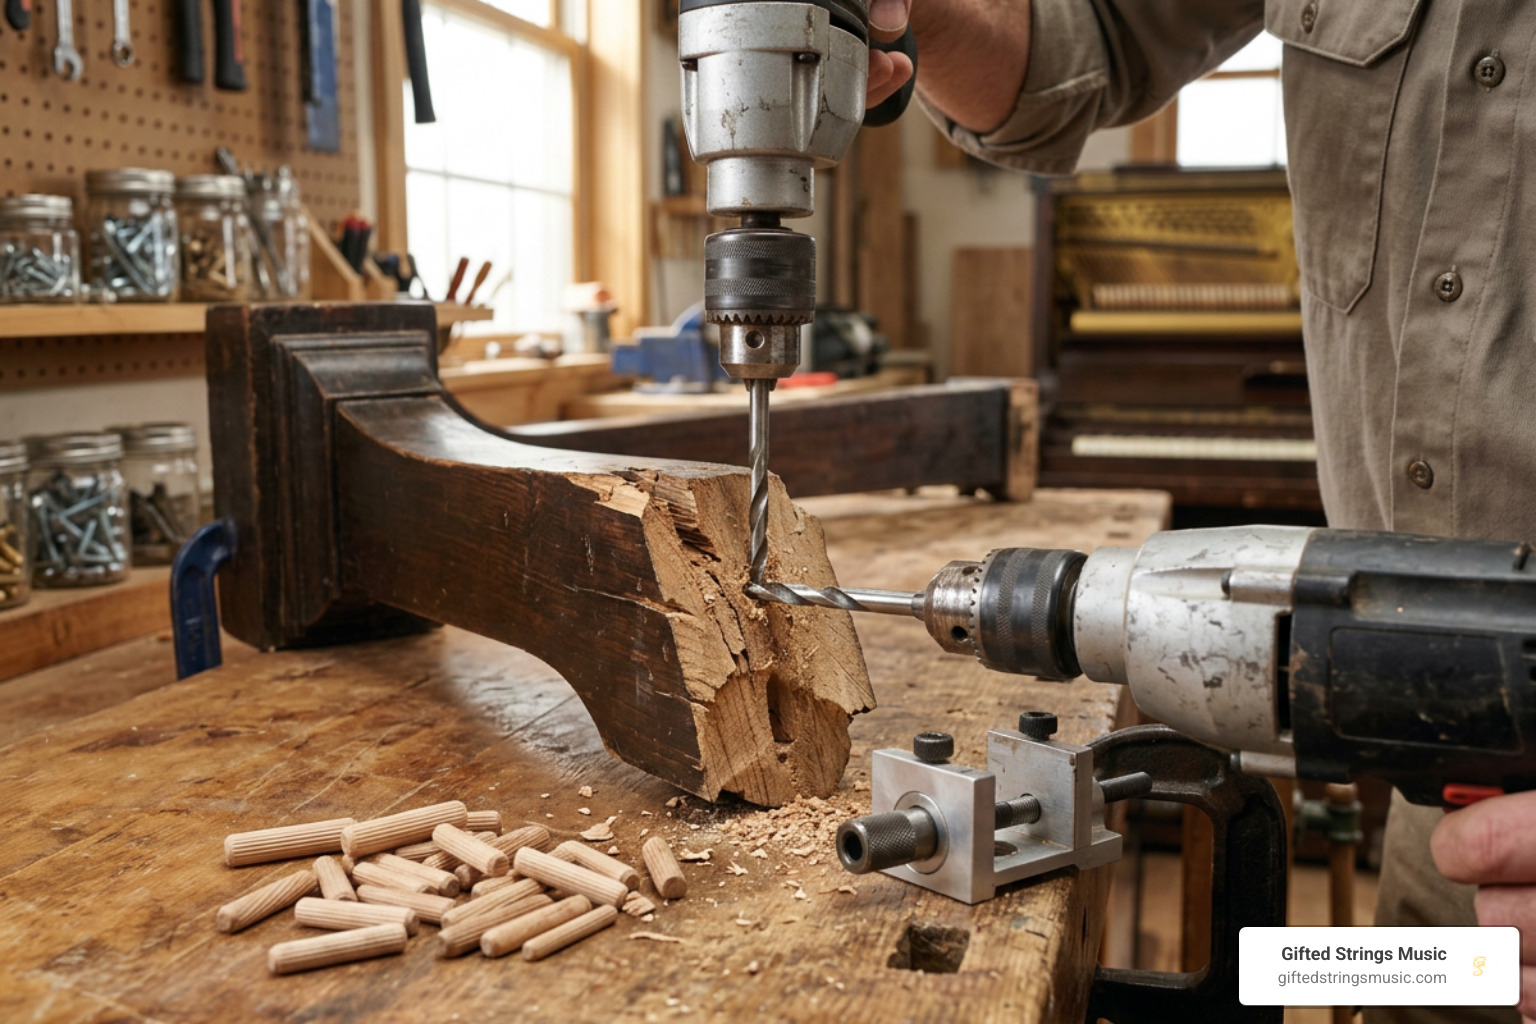
- Drill Guide Holes: Using a drill press or a self-centering doweling jig, bore a clean 1/2-inch or 3/4-inch hole directly into the center of the upper and lower fracture surfaces. Drill at least 2 inches deep into both sections (4 inches total depth).
- Select Fluted Hardwood Dowels: Use compressed, fluted birch or maple dowels. The flutes allow excess glue to escape without creating hydraulic pressure that could split the leg when clamped.
- Dry-Fit the Alignment: Insert the dowel without adhesive to check that both halves meet squarely without gaps and align vertically.
- Apply Adhesive: If using slow-cure structural epoxy, coat the interior dowel holes thoroughly and spread a generous layer across 100% of the mating wood face. Structural engineering protocols detailed in How to Repair an Upright Piano Leg [Safety & Structural Guide] – RapidRepair.blog emphasize that slow-cure formulations provide higher tensile strength than standard 5-minute hardware store epoxies.
- Clamp Evenly: Join the parts, wipe away excess squeeze-out with denatured alcohol (for epoxy) or a damp cloth (for PVA), and clamp firmly using heavy-duty parallel bar clamps.
Post-Fix Curing and Testing in Upright Piano Leg Repair
Patience during the curing phase is non-negotiable.
- Observe Strict Cure Times: Allow the adhesive to cure undisturbed under clamp pressure for a minimum of 24 to 48 hours in a climate-controlled room. Prematurely loading the joint leads to microscopic joint creep, permanently weakening the repair.
- Decompress Slowly: After full cure, remove the clamps and slowly lower your hydraulic jack. Watch the repair line closely with a flashlight as the piano’s weight transfers onto the leg.
- Check Level and Vertical Plumb: Place a spirit level on the piano keybed. If the repaired leg is slightly short due to material removed during cleaning, install precision hardwood shims or adjust the caster cup depth until the keyboard is completely level.
Taking the time to stabilize your instrument correctly reflects how gifted strings helps preserve family heirloom pianos for future generations, ensuring your family’s musical centerpiece stays safe and playable.
When to Replace vs. Repair and Long-Term Prevention
While many breaks can be repaired on-site, certain conditions require replacing the leg entirely:
- Extensive dry rot, active insect infestation, or severe wood crumbling throughout the core.
- Multiple prior failed repairs that have removed too much original timber.
- A missing leg or shattered cabriole curve that cannot be safely spliced.
Finding replacement parts for antique uprights can be challenging. As documented by master woodworkers in Replacing a Carved Walnut Steinway Piano Cabriole Leg, original factory leg blanks are often discontinued or destroyed. In these cases, replacement legs must either be custom-turned on a lathe by an artisan woodworker or sourced from donor instruments and piano supply houses. If modern mounting hardware is needed, specialized OEM bolt sockets can be retrofitted into the keybed.
To determine whether your piano needs localized woodworking or complete mechanical revitalization, consider exploring our piano restoration service or reading our guide comparing piano reconditioning vs piano full restoration.
Frequently Asked Questions About Piano Repairs
Can standard wood glue hold an upright piano leg without internal reinforcement?
No. Standard wood glue bonds wood fibers efficiently along long-grain joints, but most piano leg breaks involve cross-grain or end-grain fractures. The massive downward weight combined with lateral shear forces will cause unreinforced glue joints to snap quickly. A 1/2-inch or 3/4-inch internal hardwood dowel or steel insert is essential for long-term structural integrity.
How long should I wait before putting weight back on a repaired piano leg?
You should wait at least 24 to 48 hours before removing safety supports and subjecting the leg to load. Even if modern epoxy feels hard to the touch within a few hours, its internal molecular cross-linking requires up to two full days to achieve maximum tensile and compression strength.
What is the best way to move an upright piano without breaking the legs?
Never push an upright piano by its upper cabinet while the casters are settled into thick carpet. The wheels act as fixed anchors, creating a pivot that shears the legs off at the base. Always use dedicated four-wheel piano moving dollies under the main structural bottom board, or have helpers lift upward on the keybed while rolling to eliminate lateral drag.
Conclusion
A broken upright piano leg is a major structural concern, but with the right safety precautions, proper jacking methods, and reinforced joinery, your instrument can stand sturdy and level once again. Precision woodworking, clean gluing surfaces, and heavy-duty doweling ensure your piano remains safe for your family, students, and audiences.
If you are dealing with a severe leg break, stripped keybed hardware, or a delicate antique cabinet on Long Island, our team at Gifted Strings Music brings over a decade of precision, fully insured instrument care to every project. Contact us today to explore our comprehensive services and give your piano the care it deserves.